Monday, December 14, 2015

Baking Through the Alphabet: The Letter W

My mom was visiting this weekend because Thanksgiving didn't work out and Christmas won't either, so we got a little bit of time together for about 5 days.  She really wanted to watch White Christmas with us but my kids really wanted to see Willie Wonka & the Chocolate Factory, so, you know, Grandma is in town, so we just watched both!  Which meant that we had to skip over most of the alphabet to focus on "W".

The Letter W:


Letter W Meal:
  • Weiswurst
  • Wild Rice
  • Watermelon (Remember in Lady and the Tramp, when the wife is pregnant and she asked her husband to go to the store to get watermelon?  It's one of my favorite parts because he leaves the house during a blizzard so the likelihood of him finding watermelon in winter, in the Victorian era was next to none.  As a mom, who has had crazy cravings, I love that part!  Luckily, we live today and it wasn't too hard to find watermelon.  
  • Water to drink


Baking With the Letter "W":  Waffles

For our baking project, we made my favorite waffles for this time of year.  Normally I love waffles made with cornstarch substituted for part of the flour.  The cornstarch makes the waffles crispy on the outside and soft and delicious on the inside.  (Here we made a mix for cornstarch waffles - so yummy!)

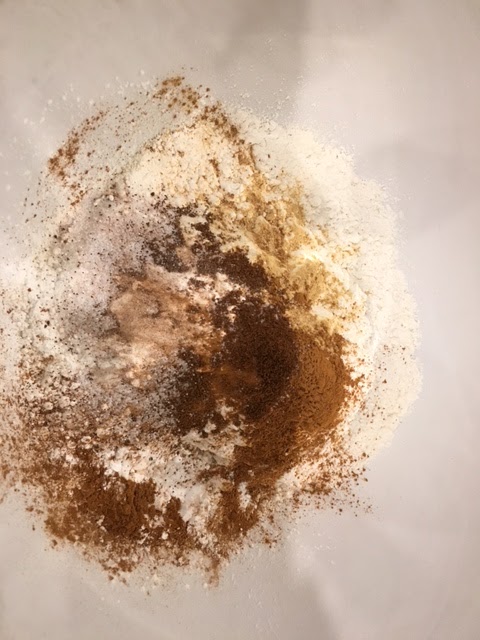
The waffles made for W were actually gingerbread flavored, complete with molasses, cinnamon, cloves and, of course, ginger.   The smell in the house is amazing!  The recipe called for separated eggs and making the yolks fluffy and the whites to have stiff peaks.  That was a new thing for my lil' gal.

 Mixing the dry ingredients together.
 Beating the eggs and brown sugar until they were fluffy (we doubled this recipe, so it took 2 eggs instead of the one called for in a single recipe).
 Making stiff peaks in our egg whites.
 Melted butter with this amazing contraption from Tupperware.  It keeps your butter from splattering all over the microwave.  Love it!  (I don't get anything from Tupperware, I just love this product of theirs and thought I'd share.)
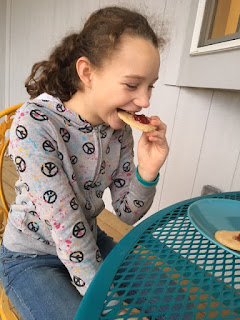
 I like to freeze.  They make THE BEST frozen-to-toaster waffles!  And like I mentioned above, the house will smell amazing and festive!
We like to put applesauce on our gingerbread waffles.  But they taste great with syrup and butter too.  


Letter W Musicals: (* = ones that are , in my opinion, decent or fun to watch; ** = kid friendly; *** = the one we watched for our alphabet musical)


  • Willy Wonka & the Chocolate Factory***
  • White Christmas ***
  • The Wizard of Oz **
  • Winnie the Pooh Movies**
  • West Side Story *
  • Wicked *     
My kids LOVE Willy Wonka and the Chocolate Factory.  They like how good the boy Charlie is, the fun songs and the funny things that happen in the show.  

White Christmas is just a classic.  Both my kiddos had a hard time watching my favorite song "Count Your Blessings" because the movie is a tad slow there, but overall it was a winner.  

We watched The Wizard of Oz for [their] first time this summer.  When I was a kid, I remember thinking that it was the longest movie ever!  But it's really not that long.  And the 13 and 11 year olds liked it a lot. 

While we haven't watched any of the Winnie the Poohs lately, when my kids were much, much younger, they loved them!  And I loved watching them with them!  

I put West Side Story on here because it is a good musical.  I think it would be fun to take my kids to a stage version.  

I just saw Wicked for the first time a few months ago.  It was great!  I would definitely take my kids to see it in a theater, but it did mess with the whole Wizard of Oz ideal and that was tricky for me to get around.  But it was cool to see the "wicked witch's" side of the story.  

Friday, December 11, 2015

Furniture Friday: Making It Work With a Restored Family Heirloom


I've been dreaming about this "Olofstorp" wall cabinet from IKEA for months and months!  It's beautiful and seemed to be a perfect fit for our guest bathroom.  That bathroom houses our medicine, sun screen, band-aids, etc.  The cabinet design was exactly what I was looking for: something solid (this is solid pine with steel hinges) and something farm-ish style.  Everything about it was perfect!  
The price though! The price.  As a family, we have been setting a budget and then discussing it together monthly.  While we could probably get this, there were so many other things that are more important, so to us, $199 was a little steep for just one small cabinet for the guest bathroom.   Plus, I have been trying to live by the adage: "Use it up, wear it out; make it do, or do without" I mean it's under the title of my blog page!  

Sadly, I sometimes get hung up on things that I think are perfect for a particular place.  So, it was hard for me to imagine anything else looking good in the spot I prepared for it.  But luckily my husband is really pretty good at this whole making do or doing without and he's also pretty amazing at interior decorating (which I never knew until recently when I had to be gone all day and we had about 30 people coming over in the evening; which put him in charge of cleaning and decorating - but that is another story for another day).  

Any-hoo, he suggested that I take an open shelved cabinet that I inherited from my grandmother and put it in guest bathroom.  I kind of rolled my eyes and hemmed and hawed for a bit.  Finally I decided that it would be fine to at least try it and if I don't love it after a while, then I'd just save up and get the Olofstorp.  

For a long time I figured that I would need to go to a store and buy some cute, yet useful, glass and tin containers in which to hold all of the medicine.  

I finally went with the old standby - the thrift store!  

I spent $16 on baskets, glassware, wood, and a tin.  I already had both colors of spray paint on hand, so that didn't cost me anything.  

Two white glass vases, a wooden bowl, a wooden basket, the red tin, and the square basket. The clear glass I found with candles in them in front of the glass recycling container last year.

All the hidden medicine. 
 
Each item repainted and ready for display.


Wednesday, December 9, 2015

Whatever Wednesday: Why is my spray paint bubbling up!?!


I recently stripped and repainted an awesome bit of vintage kitchen plastic wrap holder a couple of weeks ago.  My friend had painted it with my favorite spray paint but called when it turned out that it had bubbled up over a large portion of the holder.


Then yesterday, my SIL texted me a picture with a project that had the same thing happening.

In both cases, they were working with metal objects.  And in both cases it could only be fixed by sanding the portion down with 220 grit sand paper, or by stripping the entire things, as I did my friend's plastic wrap holder.

So, here are some reasons that your spray paint may bubble up, especially when painting metal.


  1. It is too wet outside.  This requires a longer dry time on first coats.  So, if you start putting on a second coat before the first one has time to dry, it will bubble.  Even if you're spraying in your garage, the humidity in there is similar to what it is outside.  We live in a pretty humid climate, and yesterday in particular was very foggy.  All those clouds hanging low did not allow for the paint to cure as quickly as it might say on the spray paint can.  
  2. It's too cold outside.  Especially with metal, it is important to make sure that the outside temperature is between 50 degrees and 90 degrees Fahrenheit.  But remember that metal will stay colder longer than, say, wicker or wood, so it may need to be warmer or in warmer sunlight.  
  3. It's too hot outside.  I haven't ever really had a problem with my paint bubbling up if it's too hot, but I hear that it can happen.  If I could guess, though, I would think that, at least where I live, when it's hot it's also more humid, so back to number 1.  
  4. You cleaned your piece but didn't give it enough time to dry.  The object needs to be clean and very dry in order to make a nice smooth finish.  
If you do get the bubbling, sand with 220 grit sandpaper, wipe with a dry cloth, and then apply the spray paint again.  OR you can strip the entire thing down, but this is very, VERY time-consuming and a lot of work.  I mean, I did it because it was for a friend, and a client, but if the project were mine, I would have just sanded it and repainted it.

Here is the suggested dry time for my favorite Rustoleum 2X Ultra Cover Paint+Primer:
       
Dry and Recoat times are based on 70 degrees Fahrenheit - 50% relative humidity

  • Allow more time at cooler temperatures. 
  • Dries to the touch in 20 minutes, to handle in 1 hour and fully dry in 24 hours.  
  • Apply a second coat or Clear coat within 1 hour or after 24 hours. 

  I always thought that spray paint dried and was ready for another coat after just 10 minutes, and I will say that in the summer, sometimes that's all it takes.  But always, especially in humid climates, it takes 24 hours to fully dry and sometimes a few days before I want to place other spray painted objects on it.  It needs to cure fully.


Monday, December 7, 2015

Baking Through the Alphabet: The Letter L

The Letter L:


Letter L Meal:

  • Lasagna (of course)
  • Lettuce Salad
  • Lemonade (home-squeezed - because I had tons of lemons which I bought for the letter L, but then didn't know what to do with them - I mean, what else do you do with two pounds of lemons?) 
  • Lime-Mint cooler (my kids' favorite recipe from their Grammy)


I gave my daughter the choice between a Lemon Loaf cake (which would have been a good use for that pound of lemons) and Lintzer Cookies.  She chose Lintzer cookies and I am so glad that she did!  They were relatively easy to make and because of the almonds that are in them.  They reminded me of my Grandmother Gillis (who is from Germany and always seems to put almonds in everything!).  And for some reason, they reminded me of Christmas.  So, we made enough to give as gifts to our neighbors in a cookie exchange.  Here's where I found the recipe: cookingclassy.com


Letter L Musicals: (* = ones that are , in my opinion, decent or fun to watch; ** = kid friendly; *** = the one we watched for our alphabet musical)


If I could have seen it in a movie or on broadway, The Light Princess would have been my choice for my kids to see for the letter L.  The Light Princess is a fairy tale by George MacDonald.  He is my husband's favorite author, so we've read it a few times.  Tori Amos did a lot of the music for it, and since I enjoy much of her work too, it seems like something I'd like to see.  BUT, that wasn't an option at the moment, so going on to the next best thing: Disney musicals.  
As we're going through the alphabet, I have come to realize that my kids have not watched some classic Disney movies!  They hadn't even seen The Lion King!  (Good thing we're doing this little project of watching movies incessantly instead of playing outside!)

I haven't shown them Labyrinth yet, but at 11 and 14 I think they could handle it.  It's not my favorite musical but my husband, a true 80s child, loves it!  
  • The Lion King***
  • Lady and the Tramp **
  • The Little Mermaid **
  • The Light Princess**
  • Labyrinth*     


Wednesday, December 2, 2015

Whatever Wednesday: Santas and Snowmen


This summer my mom and I got together to make these amazing, HUGE Santas and Snowmen.  Originally made by my mom's brother, Terrell, we decided to duplicate them en masse.

The original snowman.
The original Santa made and painted by my uncle in 1986.
My mom and I had a friend cut six Santas out of 1/2 inch plywood. 
And six snowmen out of the same.
The snowmen were very easy and quick to just hand paint.  We primed them first and then just hand painted them.


The Santas were a little more time-consuming and more tricky.  After painting one of them by hand and it taking a very long time, we decided to take a different approach.  Here's what we did:

Primed the wood.

Painted the skin of the faces.
 

Took painter's tape and covered any place that we wanted to keep white, green, or black (anything not red).


We laid three Santas out on the grass and spray painted them dark red.

Then repeated with the rest of the Santas, using the tape and paper from the previous three (which is why it is red in the picture below).


After they were dried (about twenty minutes) we took them inside to hand paint the eyes, gloves, boots, and any other touch up that was needed.


We put a protective coat over the top (since these will probably stand outside in the elements).