Saturday, December 13, 2014

Catching Up


You may have noticed that I haven't posted in a long while!  My family and I sold our house in KC and moved out to the country.  We're currently renting a beautiful home while building a new one.  I know, an amazing dream in the works and a great blessing!

Now that I'm a little more settled, I would love to share some things I've been working on!

When I "grew up" and became a wife and mother, I figured out fast that I had a hard time staying on task and keeping up with the job, the family and the home.  So, I came up with themes for myself to get stuff done, like Mopping Monday and Fish Friday and Water the plants Wednesday.  This way I often could remember what to do, when, and things were less likely to be neglected.  Does anyone else do that?  Well, anyway, I know it's a little weird, but it sure has helped me A LOT!

In order to keep myself on task here, I decided that I had better do something similar for this blog.  So, introducing:    


To save money, and to know what's going into our daily meals, I've been working a lot with mixes from Pinterest and from The Make-A-Mix Cookbook.  On Mondays, I'll just give some info on how I thought the mix worked, or if I think another worked better; if it sped up my cooking time, etc.


Wednesdays will be filled with different things.  Whatever I have worked on recently that doesn't fall into the other two categories.  For instance, when my kids were much younger, to help in learning the alphabet and how to read, each week we focused on one letter. And in that week, for one meal, we'd focus on that same letter.  My daughter, being the youngest, doesn't remember it and only remembers seeing the signs I made (which sadly didn't make it in the move).  Anyway, though she is an avid reader, she wanted to do that again.  Only this time wanted to pair it with, what she called, "Baking Through the Alphabet".  Among other things, look for that on Wednesdays.


And of course, my stress-reliever and enjoyment, finding furniture in dumpsters or on the side of the road or at the Habitat ReStore and making them to fit my home (or another person's home). 

Because the holiday break is fast approaching, I'll be starting this at the beginning of the new year. See you then!

* I may not always be able to post every Monday, Wednesday, and Friday, but I will do my best to get it done.*

Friday, October 10, 2014

Beautiful Beliefs

  I have some beautiful beliefs.  They concern the tender mercies of a loving Heavenly Father and the love, example and the grace of His Son, Jesus Christ.  Through the years, through myself or close loved ones, I have encountered depression, divorce, death, addictions, anxiety and other weighty matters.  Yet over and over two beautiful beliefs have supported me and sustained me through times of trial.  
                
The first belief is in the scripture from John 14: 18 and 27: "I will not leave you comfortless: I will come to you....Peace I leave with you, my peace I give unto you: not as the world giveth, give I unto you. Let not your heart be troubled, neither let it be afraid."  We are given peace from The Savior - that peace can be found even in times of anguish and despair.  I have felt that peace again and again.  
             
The other belief that has sustained me is kind of two-fold but all makes sense as one concept.  I am a spirit daughter of a loving Heavenly Father and He loves me.  He wants me to live with him again and sent His Son to atone for my sins so that I could live with them both again.  And because I am a spirit daughter, so is my own mother; my husband is a spirit son and my children are His also.  He wants us all to be with Him again; and because of that I have the opportunity to live with my family even after I pass away!  Isn't that a beautiful belief?  
                 
Only....I have asked in prayer if it is really a true belief....and through scripture study and much prayer and even some fasting, I now know, that when I strive to do what is right, I will truly be able to be with my loved ones!  I know it!  
                  
I wish everyone could feel of the Savior's peace; that they too could know that God loves us and that we have the opportunity to be with our very own families forever and ever.
  
I am a member of the Church of Jesus Christ of Latter-day Saints and I have some beautiful beliefs.   

Pinable Image
We belong to the Church of Jesus Christ of Latter Day Saints otherwise known as "The Mormons". We are proud of this part of who we are! We are excited to team up with over 65+ of us strong... to extend an invitation to see a film. A film entitled "Meet The Mormons". This film is not meant to be an "in your face" - you must join our church film. It is simply designed and produced to uplift and inspire you through six stories of those of our faith who have followed promptings to follow Christ more fully in their lives. We hope you take the opportunity to enjoy this film. We hope your hearts are made light as you feel the goodness that comes from following our Christ and Savior. All proceeds from the film will be donated to The American Red Cross. So not only will you be uplifted and inspired, your money will be going to an amazing charity!!
[embed]https://www.youtube.com/watch?v=n2Y8Jalsf54[/embed] We also would like to take a moment and share our personal testimonies, stories of our own personal conversions, and our own stories of how following our Savior, Jesus Christ has changed our lives. The light of the gospel of Jesus Christ offers a joy and hope that only following him can provide. We hope as you click through and read our stories and testimonies of the Church of Jesus Christ of Latter Day Saints, you will feel uplifted and encouraged. We are by you! We love connecting with our readers, that is why many of us do what we do! Please be kind and considerate in your comments. It takes great bravery for us to open our hearts and our mouths to share with you such a tender and personal part of who we are. We share because we feel strongly the need to share the peace and the hope that is the Gospel of Jesus Christ.
I'm A Mormon #1
Anita | Live Like You Are Rich, Landee | Landee Lu , Tara & Devin | Salt & Pepper Moms , Mallory & Savannah | Classy Clutter Kelli & Kristi| Lolly Jane
McKenzie | Girl Loves Glam , Pam & Lisa | Over The Big Moon , Melanie | Forty Eighteen , Sky | Capital B Adell | Baked in Arizona
I'm a Mormon #2
Andie | Maybe I Will , Shatzi | Love and Laundry , Robyn | Create it Go , Rachel | R & R Workshop
Tiffany | Feel Great In 8 , Katelyn | What Up Fagens? , Brittany | BrittanyBullen , Ginger | Ginger Snap Crafts , Stephanie | Crafting In The Rain
Chelsey | Cee Me Be , Amber | Crazy Little Projects , Kallie | Smitten By, Elyse, Kristen, Lauren, Steph, Kendra & Camille | Six Sisters Stuff Annette | Tips From A Typical Mom
Kierste | Simply Kierste , Tayler | The Morrell Tale, Jennifer | My Daylights , Cambria | Live To Be Inspired, Danielle | Today's The Best Day
I'm a Mormon #3
Nat & Holly | My Sister's Suitcase, Britni| Play.Party.Pin , Montserrat | Cranial Hiccups , Heidi | A Lively Hope , Ashley & Meegan | Flats to Flip Flops


Thursday, October 9, 2014

Back Again and Five pieces of Furniture in Three Days

It has been a long time and it's time now for me to get this blog up and running again.  I'm trying again to post on Thursdays but may try other days in addition depending on how my Thursday posts go.

This does include some instructions and hints, good products to use and things I've learned along the way.  I don't get paid for anything from any of the companies I'm mentioning, it's just what I use and what I've found works well.

So...Five pieces of Furniture in Three Days...yes, that really happened!  It was actually six pieces of furniture worked on, five finished.  My mom and I met each other for our second annual trip to Bartlesville, Oklahoma (my home town) so we could attend the 100 Mile Garage Sale!  Awesome, right?

She and her husband have a store where they sale antiques and refurbished furniture so we were mostly looking for things for her. 

My mom needed some dressers - they were hard to come by (at least in our price range) but we finally found one as the second day was winding down.  We also purchased a fantastic school desk, and a TV cart (which we got for only $.75)!

In addition, I'd been hanging onto a chest-of-drawers that I found in someone's garbage pile that I told my mom she could have- it had beautiful lines but the veneer was chipped on the top (almost completely in some places).  And then my grandmother gave me a dresser that she had had since she was a little girl (85+ years ago - she's 89); I wanted to paint it black to store items for my new business.

My pictures on this post are aren't very good.  The lighting was poor and my camera's batteries were completely dead, so it was my phone that had to try to be acceptable.  AND we were in such a hurry that we only got pictures of four of the pieces.   

Here's what we did:

Uh...ignore the kittens in the picture.  The desk is a beauty!  Vintage! Truly old-school awesomeness!  But whoever owned it before did a really shoddy job painting it!  First of all, they used a paint brush and put the strokes on too thickly.  There's a great thing called spray paint for metal legs like these.  We painted it lime green (or chartreuse, which is a really fun name for a color). 


For the top (which was also painted with the thickly coated paintbrush), we planned to paint with chalkboard paint because who doesn't love chalkboards and the endless art projects that can commence thereon?  But because of the horrible paint job (ok, I'll stop harping on it), I decided to strip it.  This turned out to be easier than I expected.  I just slathered some Citrustrip on it, left it while we were working on the dressers (a couple of hours), and came back and scraped it off. 
Then a good sanding took the sticky residue off and it was ready for chalkboard paint.  Only it looked so beautiful with it's plain wood (which reminded me of the floors in the 1914 old brick middle school I attended) that we decided to keep it simple and beautiful.


 This is how I found the dresser on the side of the road.  Partially painted, the bottom piece falling off, and the top veneer completely chipping or missing.

 To remove the veneer, I started out by just scraping it.  But that was nearly impossible in some places.  I tried out my heat gun - and it worked but I kept burning the edges of the veneer...so I tried out my iron.  It worked perfectly!  The veneer came off like stickers on wax paper.  (Though, then I had to clean it because when I tried to iron our whites, it left marks on the clothes.  :-(  So in the future, I'll be looking out for a crummy old iron to use on this sort of project.). 


Here's something that I so often forget!!  On these old dressers it is best NOT to paint the inside portion because the drawers will just get stuck and then you'll have to sand what you've painted just to get them to move smoothly.  I hope this is the last time I forget that - it adds a lot of time to a project to sand down what you've only just painted!


My pictures on this post are aren't very good.  The lighting was poor and my camera's batteries were completely dead, so it was my phone that had to try to be acceptable.  Because the top was already distressed with tiny holes and nicks from the natural wood (which the veneer would have covered up) we added an antique glaze to this.  I hoped to get better pictures when my mom got back to the store, but they put these out on the floor before she even went home and they were sold before she get me a good pic - so - they really did look better in person!  


This one we got at a garage sale for $8. That's in our price range!  This was an easy fix.  We just put some KleanStrip brand sander deglosser on all the surfaces.  The veneer top got a sanding and then the sander deglosser.  We then rolled on some black paint with a brush and a cabinet and door roller.   To finish the top, I advise putting Polycrylic or something like that to protect it, especially if you're like me and live in a humid place - this will keep papers and other items from sticking to it.  It also protects it a little better from metal objects like keys, etc.  You can probably save your money and only do the top and not the entire dresser - Polycrylic is kind of pricy so I use it where I think it's most needed.
 My mom working hard on deglossing the dresser (while I take a break and snap some pictures).


I had a whole bunch of drawer pulls, but my Mom remembered a specific kind she had at home (9 hours away) that she wanted to use.  This is the only finished picture I have, but the black really cleaned it up making it sleek and ready for sale at my mom's shop.  


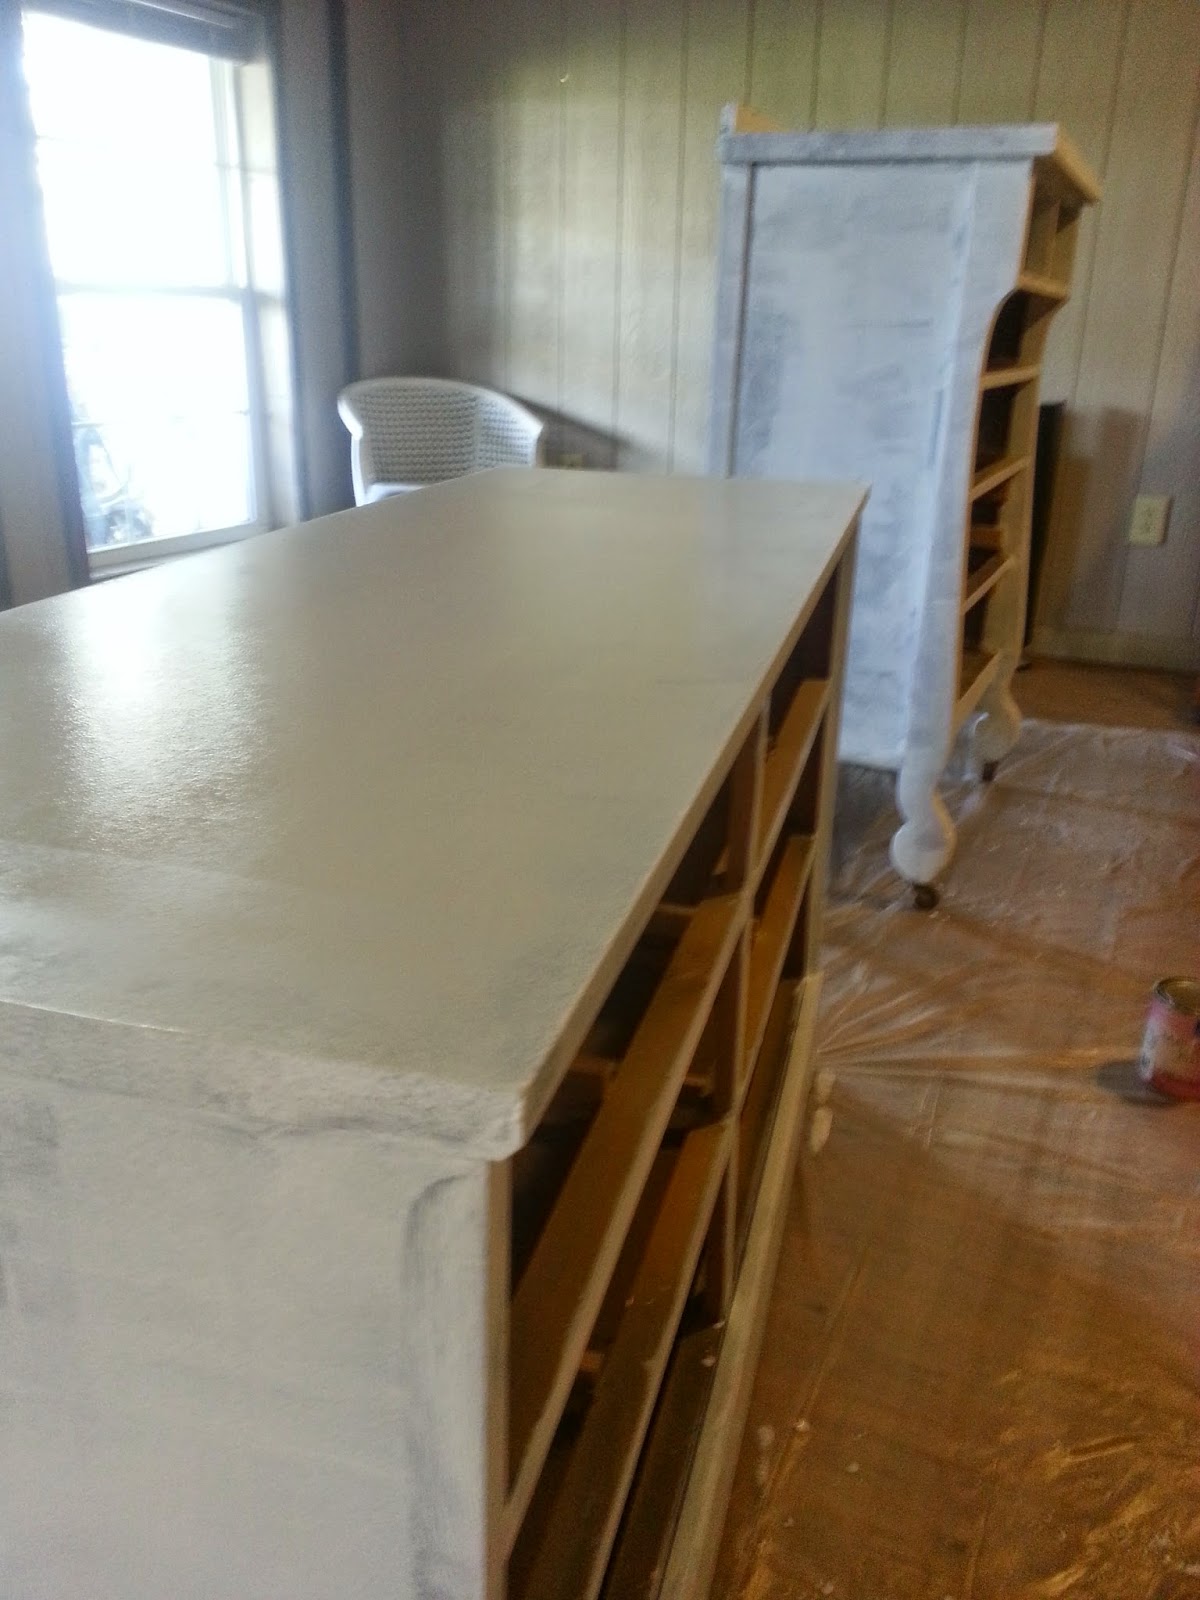
Some of the work in progress.


Start to finish tall dresser:
 Start to finish long dresser.

While in Bartlesville, I also worked on a dresser that my brother found next to the dumpster outside of his apartment complex.  It didn't have any drawers at all, as seen in the first picture on the left, so it made it easy to decide to turn it into a TV console for him!   Here's a sneak peak (but since I don't know when I'll be going to B'ville next, I'm not sure when I'll have the follow up).


Thursday, April 17, 2014

Break

You may have noticed that I missed a couple of Thursday posts.  I've been swamped trying to get our house ready to put on the market so I will be taking a break for a few months. 

Thanks for stopping by!
Krista

ps - Isn't it always the way it is? That just when you get the house the way you want it, it's time to sale it?  LOL!

Monday, April 14, 2014

10 Tiling Hints for the DIYer


We've been remodeling the bathrooms.  As seen in the previous post, the master bath was finished a few weeks ago.  Two weeks ago, we worked on our main bathroom.  The bathroom itself was already pretty decent.  Unfortunately the linoleum was worn, stained, and coming up around the bathtub which caused extensive water damage on the sub-floor and the hardwood under that!

I had a friend who was moving out of state, who offered us her brand new 16" tile so she "wouldn't have to pack it".  It was a very kind thing for her to just give it to us and we were really excited to be able to use it to replace the yucky, never-to-come-clean linoleum.

I am by no means a professional and there are probably other ways to accomplish cutting and laying tile, but listed are some helpful hints that I learned from an architect and builder, a fix-it-man, a contractor, YouTube, and just plain trial and error.  Hopefully it will be of some use to you on your tiling project.
  • Make sure your area is vacuumed and clean of debris before placing the sub-flooring and the tiles.  
  • Use cardboard to make templates for tricky areas. Draw what cuts you need, cut them from the cardboard and then trace them onto your tile.   

  • Always, always use the rule: "measure twice, cut once" 


    • Borrow or rent a high quality tile saw (especially if using heavy floor tiles - these saws run smoothly and even though they are large and it's intimidating to use them the first time, they are easy to use and relatively safe with no kick-back).
    • Slow and steady is the trick with tile cutting.  If you try to move too quickly, you'll break the tile.  (My first tile, I had to cut three times or use three different tiles - I was glad I had so many! If I had of been short on tiles, messing up one cut that many times would have been disastrous because I didn't know where my friend had purchased them or if the store even carried that color/style anymore.)  
    • Cut and "dry" place your tiles first; once you know that all of them will fit correctly, take them all up and put in a safe place.  Then you can start putting down the thin-set or mortar.  In the first bathroom we did, we tried to cut the tiles after we had put down the mortar and it was almost dry by the time we finished that little 4x8 floor.  So, dry place them first!  (Sorry, I forgot to take  a picture of this, but we dry placed each tile and then put them on my son's carpet while we put the thin-set down.)
    • When cutting circles or even small "holes" in the tile, make strips like pictured below.  After making the strips, if they don't come out on their own while your cutting, you can gently knock them out or cut them with a tile cutter.

    • In both bathrooms we used an epoxy grout for the floor and loved it!  Here's a great tutorial.  I liked using the epoxy because it eliminated the wait time for sealing it (because you don't have to seal it).  Some things about it though, is that you have to clean it off the tiles with a mixture of vinegar-water.  In the small bathroom we accidentally waited too long...like 8 hours too long...instead of the 1 hour it suggests.  Which leads me to the next helpful hint:  
    • If you're like us, a little messy or negligent in your grouting, you can easily go back and clean it with a piece of tile - the same kind that you're putting down.  In other words, use tile to clean tile.  The tile will scrape off the grout without scratching the surface because they are the same surface.  
    • Put everything back in and enjoy your "new" room!  

    Thursday, March 27, 2014

    Expanding and updating the master bathroom

     Before and After


    When we moved into this house our master bathroom looked like scenery from a bad horror movie...and for ten years we lived with this:


    and this type of electrical work - I don't know much about electrical, but that doesn't seem very safe.
    Does this look like a fire hazard or what?

    On the other side of the tiny, gold and tan plastic bathroom was this very deep but small closet.


    But we finally remodeled it! 

    Before showing all the room pictures, we couldn't have done this in such a short amount of time without all the help from family and friends.  Svenja, how did I not get a picture of you?


     The back side of the closet from the bathroom.


    With the wall dividing the closet and bathroom gone. 

    Seeing how much larger the bathroom can be.

    Shower base in place.


    Scraping the ceiling in the old closet so it will match the bathroom.

    Shower plumbing in place (we hired our friend who is a plumber for this work!)
    Fixing the floor
    Sub-floor on


    My husband, Nate and his dad, Kerry, made these cubicles for towels and extra storage. (above)

     Kerry also fit these in between the studs on the wall opposite of the sink for more storage. (below)

    Building storage into a small space adds a little extra time to the project, but it adds so much peace of mind too!  Since closet space in the entire house is limited, the ability to roll towels and place them in the wall makes my life easier; I can roll the towels quickly to put them away and I'm not having to gather them for the kids (and my husband) to use, they can just pop them out of one of the cubbies easily.

    My father-in-law teaching me how to do tile.  (He did most of the cutting, which is really the hardest part!)


    *sigh* "much better!"