

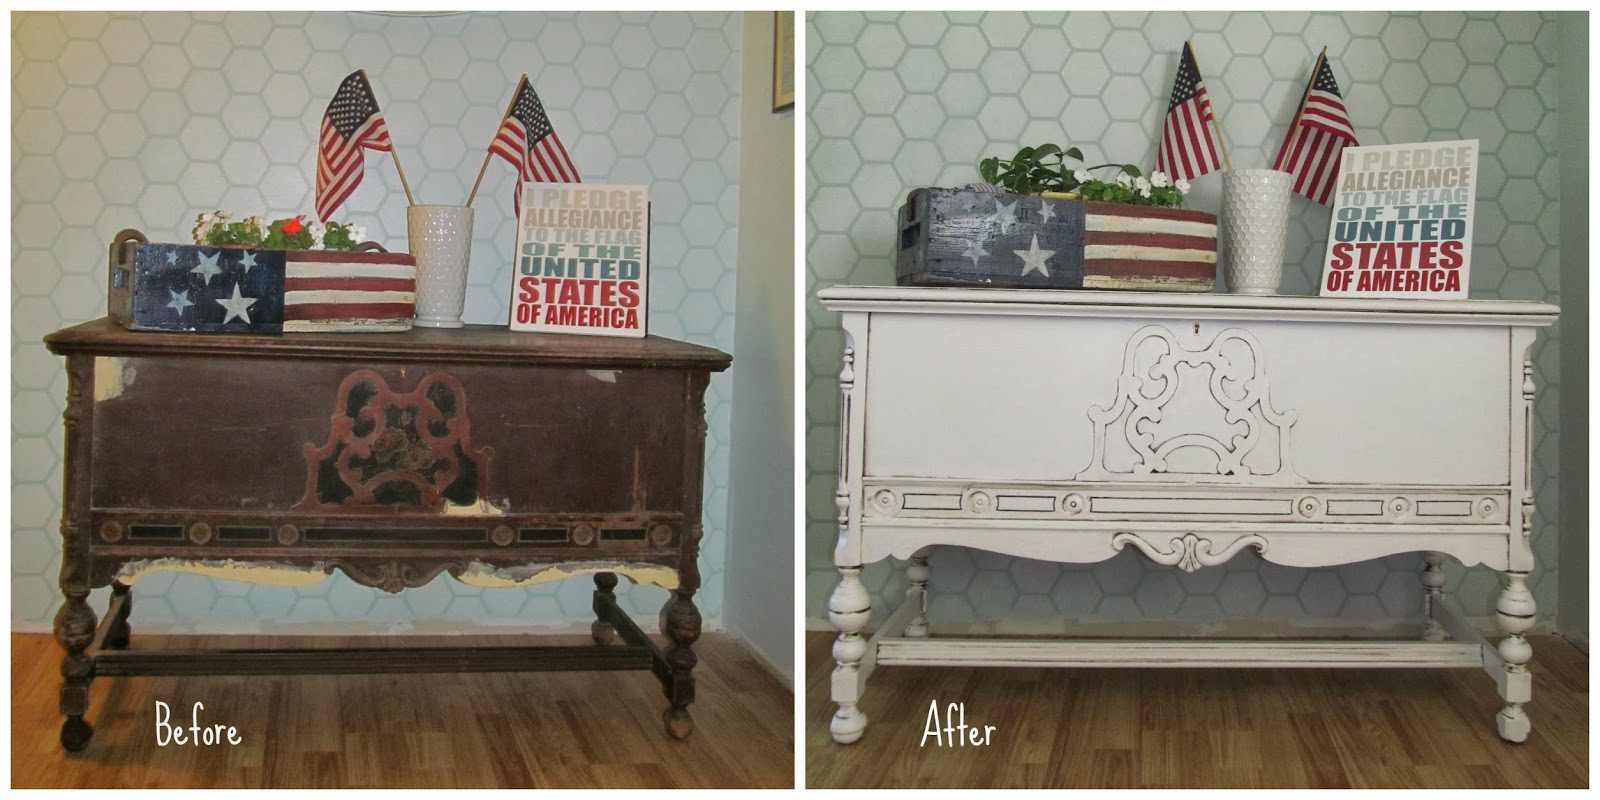
But, I digress! Last year, while I was helping a friend move into her new home, her new neighbors were hosting a garage sale. I found this beauty:


First thing I did was to fill in some of the chipped veneer with wood putty, let it dry and then I painted the entire chest in my favorite white: "Silver Feather". Some of the veneer I left - but it's actually because I forgot to check all 5 sides and was in too impatient to wait for the wood putty to dry again. As it turned out, I actually like how it looked - more "antiqued".


Lowe's has a great antiquing glaze by Valspar that I've used on all of my kitchen cabinets, all of my approximately 30 frames, a kitchen table, a buffet, a queen-sized bed, and a full-sized bed. And yes, it's lasted for all of those projects and there is still about 1/8th of it left. I can't even remember when I bought it, but the current price is about $10 - I think it's been well worth that cost! (Neither Lowe's nor Valspar, nor anyone for that matter, pays me to say any of this, I'm just giving my own thoughts.)


Then with a damp rag, wipe away the extra. I usually rinse the rag pretty regularly and then just re-use it on the next "antiqued" area of the project.

The finished product.

No comments:
Post a Comment
Hi All,
I've had a few random people commenting not-so-nice content on my blogs so now you'll have to go through some comment moderation. But feel free to still leave comments if you'd like!
Thank you!
Krista