

Remember this post here where I said: "I can't even get myself to paint or stain my piano, it seems sacrilegious!" Well...sacrilegious as it is, I suppose if someone were to ask me for help in painting a piano, then I might comply.
So this week, I was piddling around, working on my to-do list, ready to cross items off when I recieved a text asking if I could help another person to paint her piano. Thoughts: What?! Crazy! But I said: "You know I'm not really into painting pianos, but...ok, why not!"
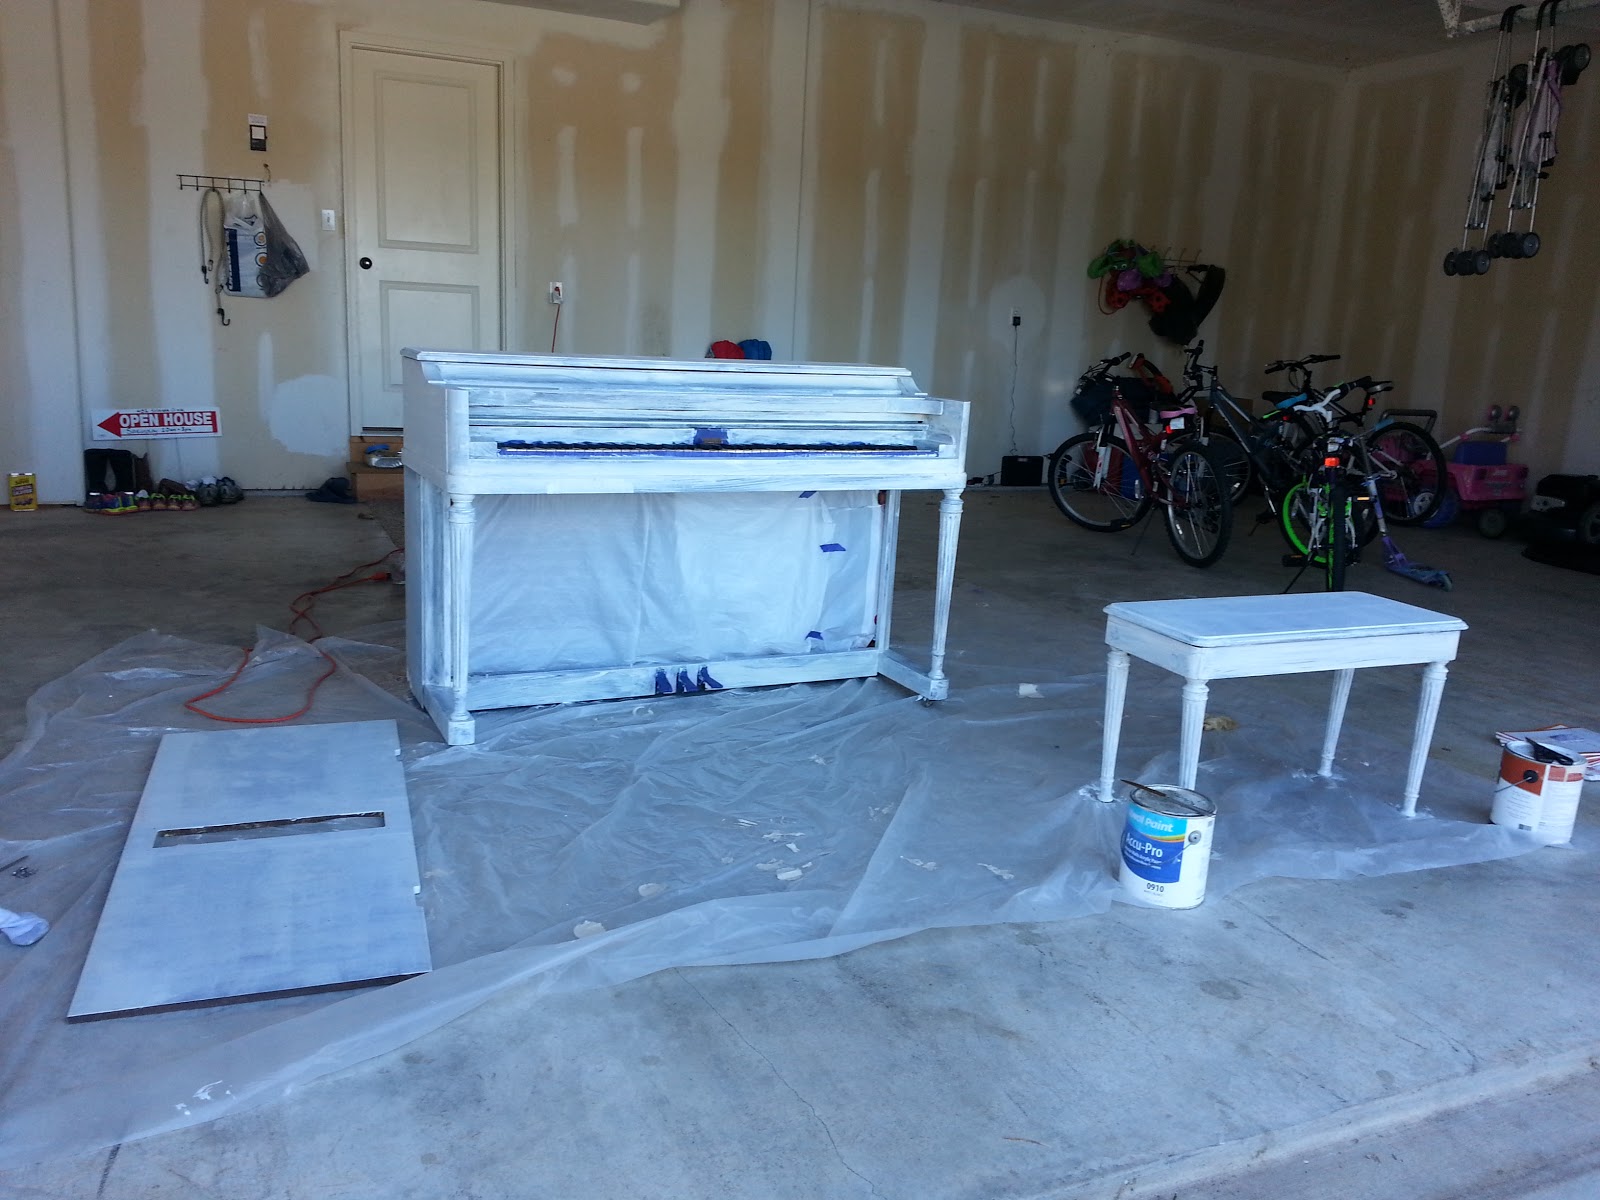
And so, it happened. We took three days to work on it; one day to prime it, one day to paint it, one day to protect it. And it was F-U-N! It was fun because I got to meet a new friend, and work with three other great ladies!
Here are the preparations we made:
- Cover the back wooden part of the soundboard with plastic and tape it really, really well

- Cover the front brass ridge and spring soundboard with plastic and tape it really, really well

- Put painters tape at the back of the keys near the felt stoppers, this, I hoped would keep the paint off of all parts of the keys and their mechanisms -
 it seemed to work really well! Because then we:
 - Put an additional amount of tape the entire length of the keyboard attached to more plastic and lots of tape to keep it sealed. (no picture, sorry)
- Sand or apply a sanding deglosser *
- Prime with Kilz 2 or Zinsser (they're my go-to primers)


- Do a light hand sanding
- We painted with a spray gun!


I'm still nervous a little thinking about it, but it worked, made a beautifully smooth surface and our preparations to cover all the working parts of the piano seemed to work perfectly! WHEW! 

- Since we used latex paint, and we live in a very humid climate, we then added Polycrylic to all the large surfaces. This gives it a strong, protective coating and keeps piano books, and anything that might be set on top of the piano, from sticking.

* A note about the sanding...if you do decide to sand, make sure that you don't sand too much. 
It doesn't matter as much when you're painting, but if you were staining, the stain has a hard time sticking to wood that has been too stripped. On this project, however, because there were some places sanded down to the wood, when we painted, the places where the stain met the bare wood bled through both the primer and the paint! So, be cautious on the sanding, or just use some sanding deglosser (Kleen Strip makes some) (see what it looks like in this post here). 

But if I were ever to do this again, here's what I'd add to the preparations above:
It just so happened, that my piano was being tuned on the third day of work on my friend's piano so I was able to learn something about how the piano comes apart which would have made it easier to paint.
- On many upright pianos, the front face (where you lean the music books) will come off - next time, I'd take this off, because:
- It would allow us to get the plastic and tape more secure on the inside of the piano
- We could sand the sides (that aren't seen) so that the paints on two surfaces won't rub against each other and keep the surface smooth
- Once that part is off, the piece that covers the keys is able to come off. It make work differently on different pianos, but that's how it works on mine.
What do you think?


No comments:
Post a Comment
Hi All,
I've had a few random people commenting not-so-nice content on my blogs so now you'll have to go through some comment moderation. But feel free to still leave comments if you'd like!
Thank you!
Krista